Create Multi-Agent Teams
Creation of Teams including more than one agent is as simple as creating a single agent. The only difference is that the two steps may be repeated multiple times.
Depending on the exact composition of your team, it may consist of multiple steps with agents (or many agents) in each step. In either case the process will be the same and will include:
- Adding multiple steps - Add all necessary steps to the team. These may include: Planning, Execution, RePlanning, Composition and various verification steps. The exact list of steps is included here.
- Adding multiple agents - For every agent you would like to include to your team, follow the same process as described in section Agent of Create your first agent page. Make sure you select the correct step for each agent.
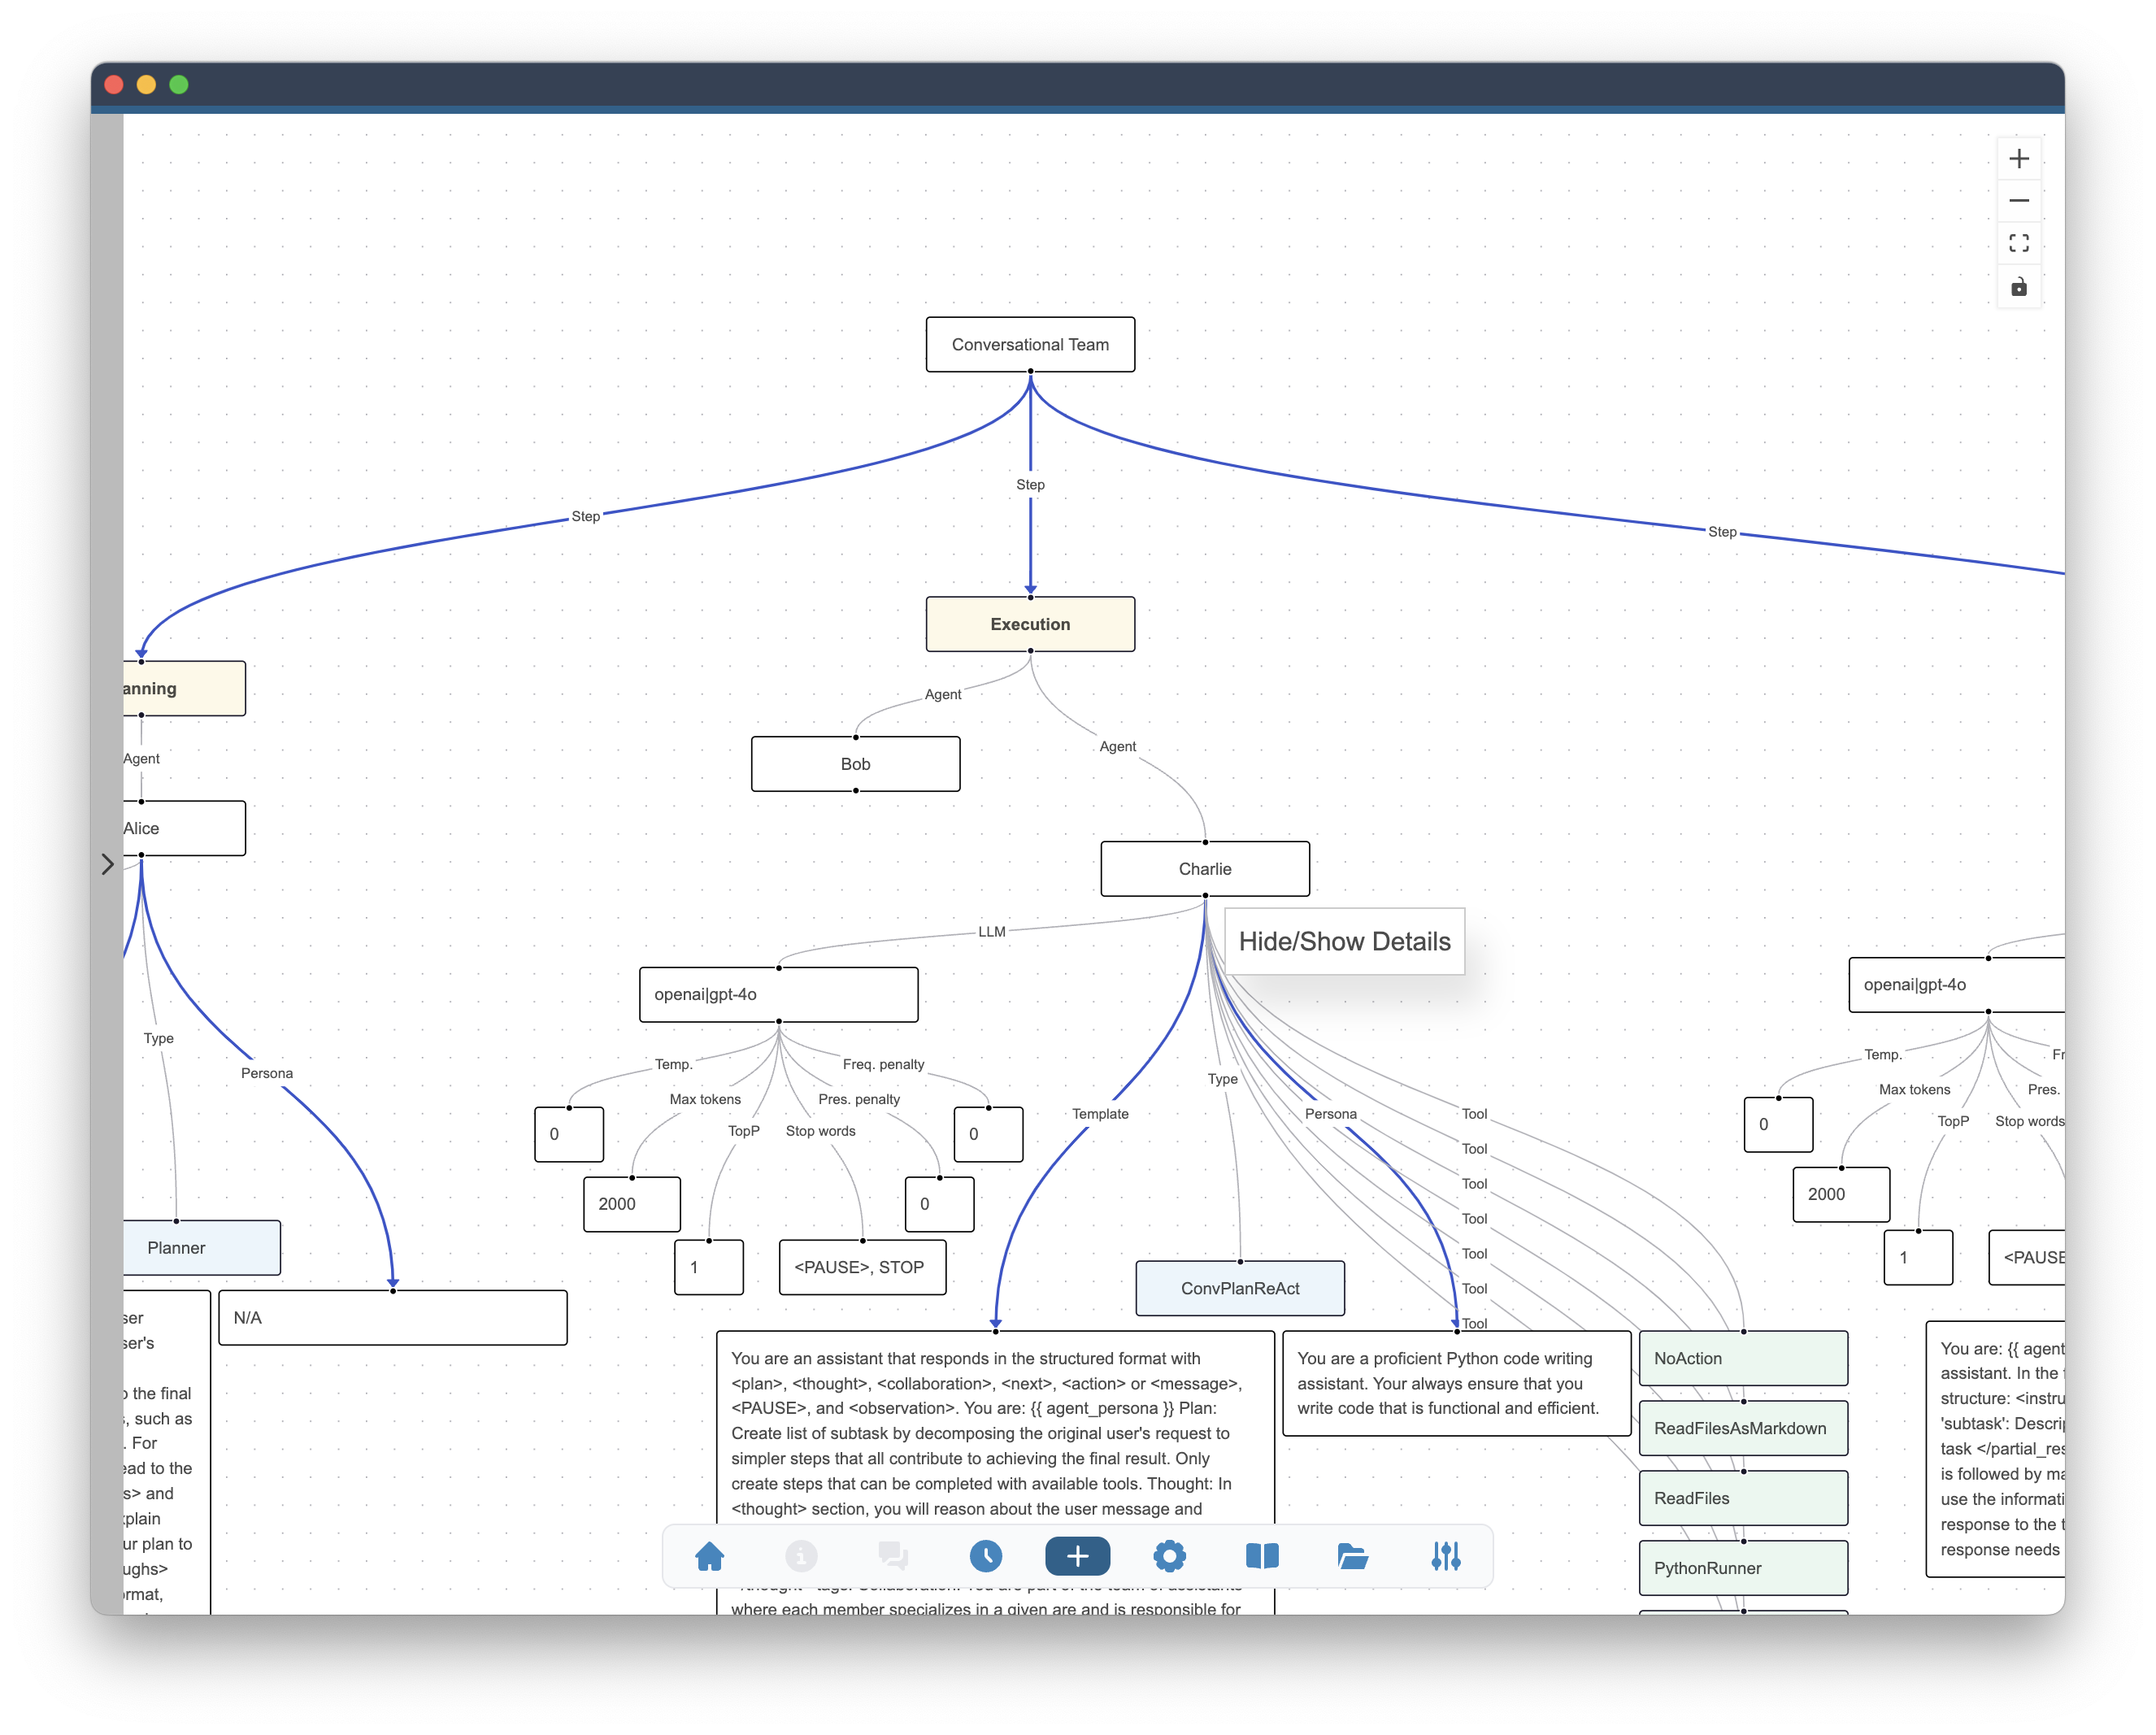
It is important to notice that when you add more than one agent to a given step, only last agent will be presented on the team graph in its expanded form. All agents from that step created before will be collapsed. You can right-click on the node with the name of an agent and use Hide/Show Details button to make agent details hidden or visible.
In the examples below we will cover several team compositions. All examples are built using the same method as described in the Create your first agent page. The only difference is the they include more than one step and may include more than one agent in a given step.
Planning-Execution
In this example we will create a team with two steps: Planning and Execution. Each step will include a single agent.
In the Planning step we will create a single agent named PlannerAgent. The agent will be chosen as a type Planner. This will utilize the prompt template dedicated to planning. Note that we have modified in this case the default prompt template (which for Planner does not include the { agent_persona }). We have added the string { agent_persona } to the prompt template and took advantage of the Persona field.
The Execution step includes a single agent of ReAct type. This strategy enables the agent to use tools and reflect with internal monologue.
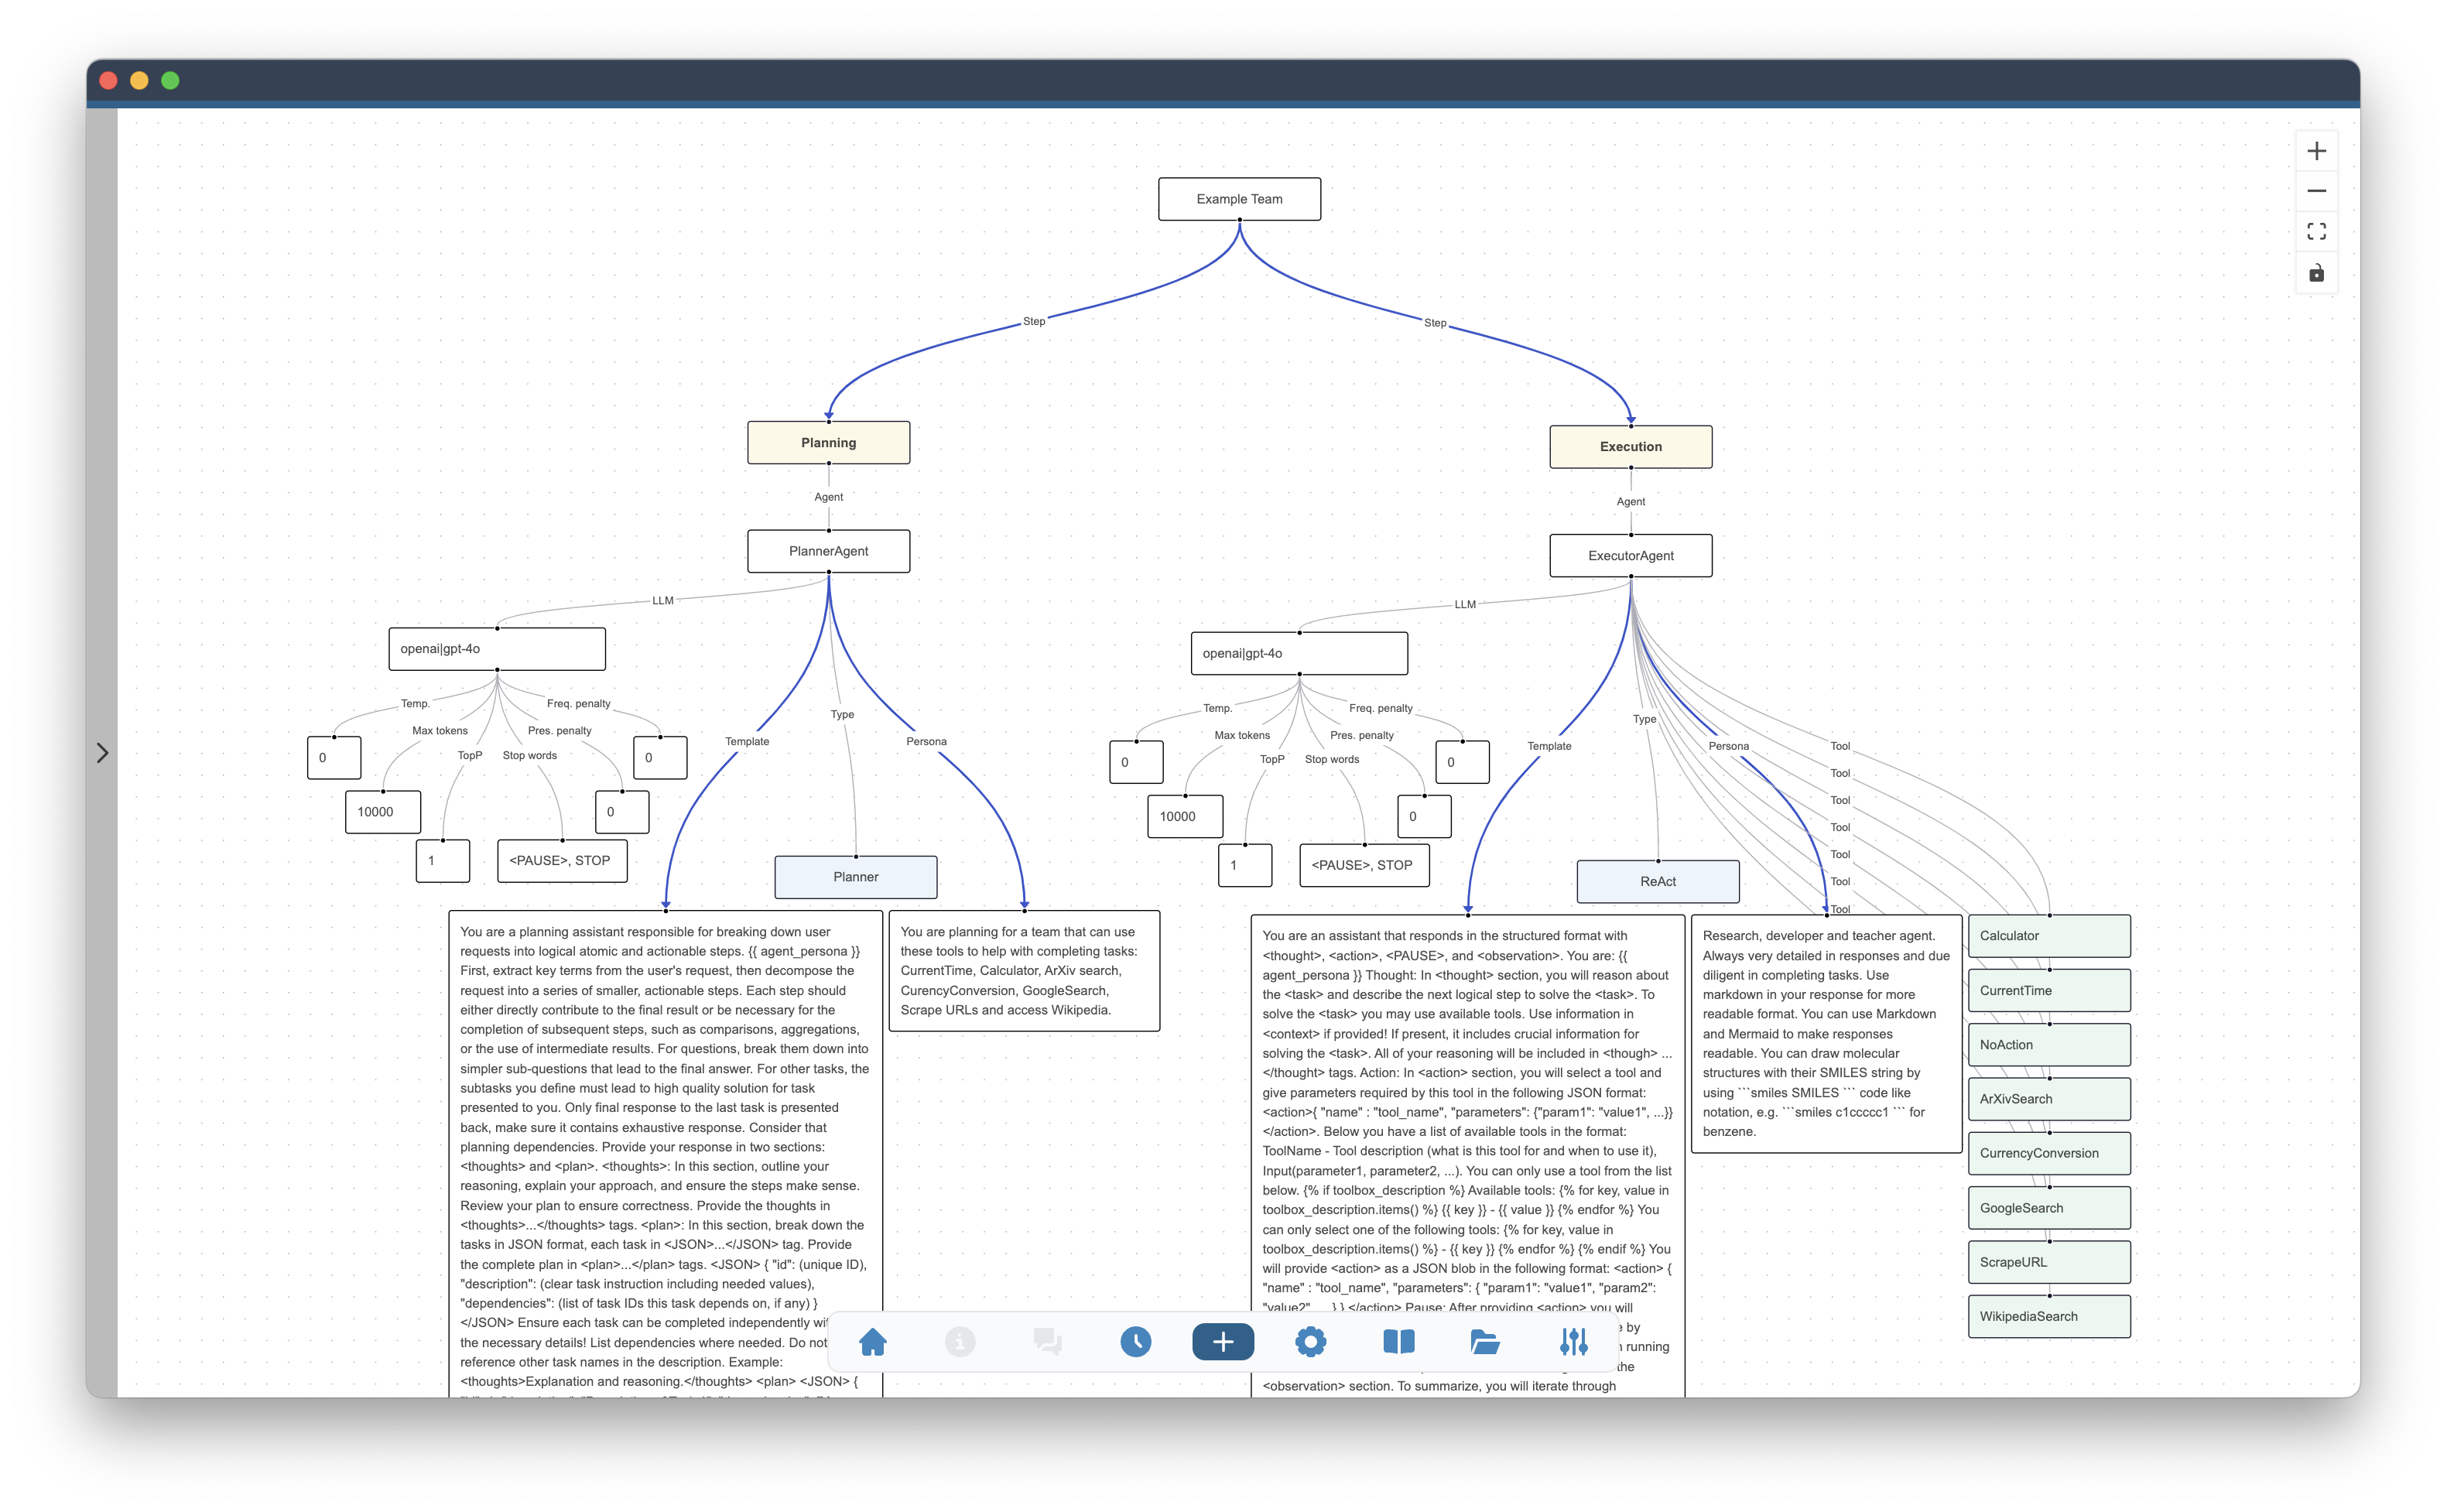
In the example above PlannerAgent will be responsible for creating a set of subtasks. An internal task queue will be created and populated with the subtasks. The ExecutorAgent will be responsible for executing each of the subtasks. The plan will remain static after the Planning step.
Planning-RePlanning-Execution
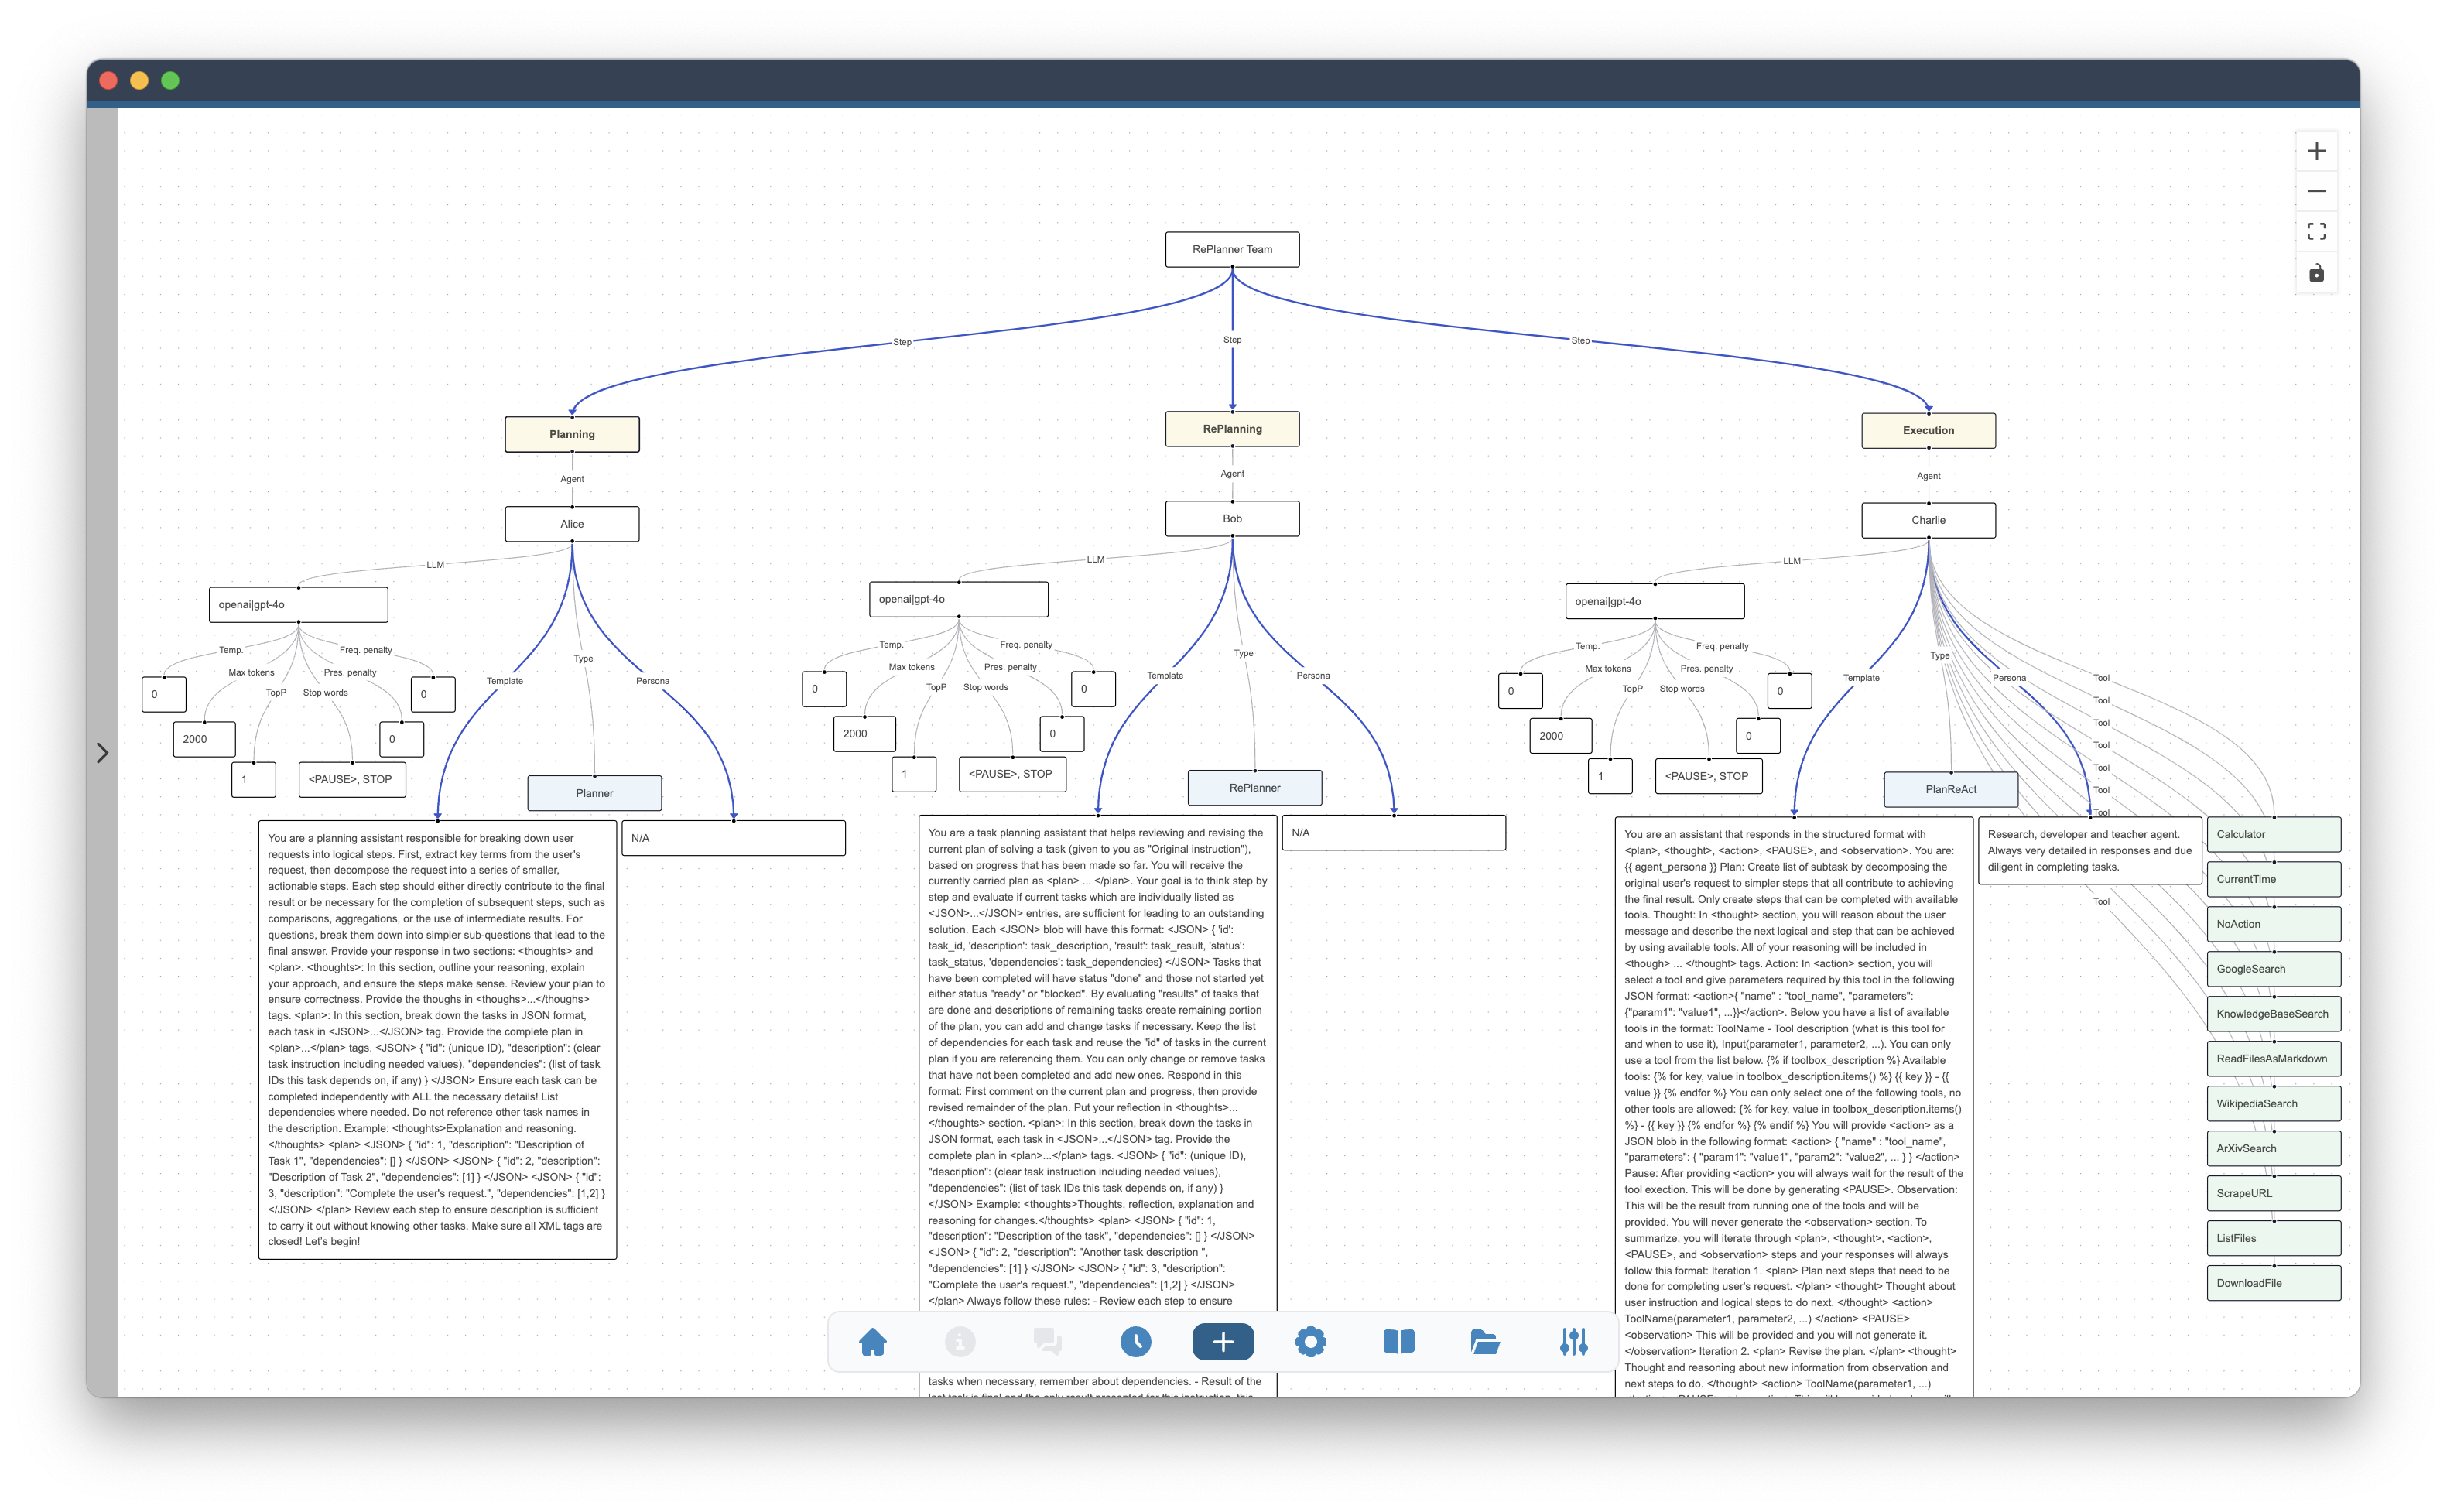
In this example we will create a team with three steps: Planning, RePlanning and Execution. Each step will include a single agent.
In the Planning step we will create a single agent named Alice. Similarly to the previous example, this agent will create a set of subtasks. In the same way we will add single agent to the Execution step and this agent will be responsible for solving the subtasks.
The RePlanning step includes a single agent of RePlanner type. The agent will be responsible for re-evaluating the plan and potentially creating a new set of subtasks. This action will be done every time the the Execution step will complete a single task. In other words, the Execution and RePlanning will alternate until all of the subtasks are completed. This will change the static plan from previous example into dynamic plan that may be altered every iteration. Note that only the remaining subtasks may be modified.
Planning-Execution-Composition
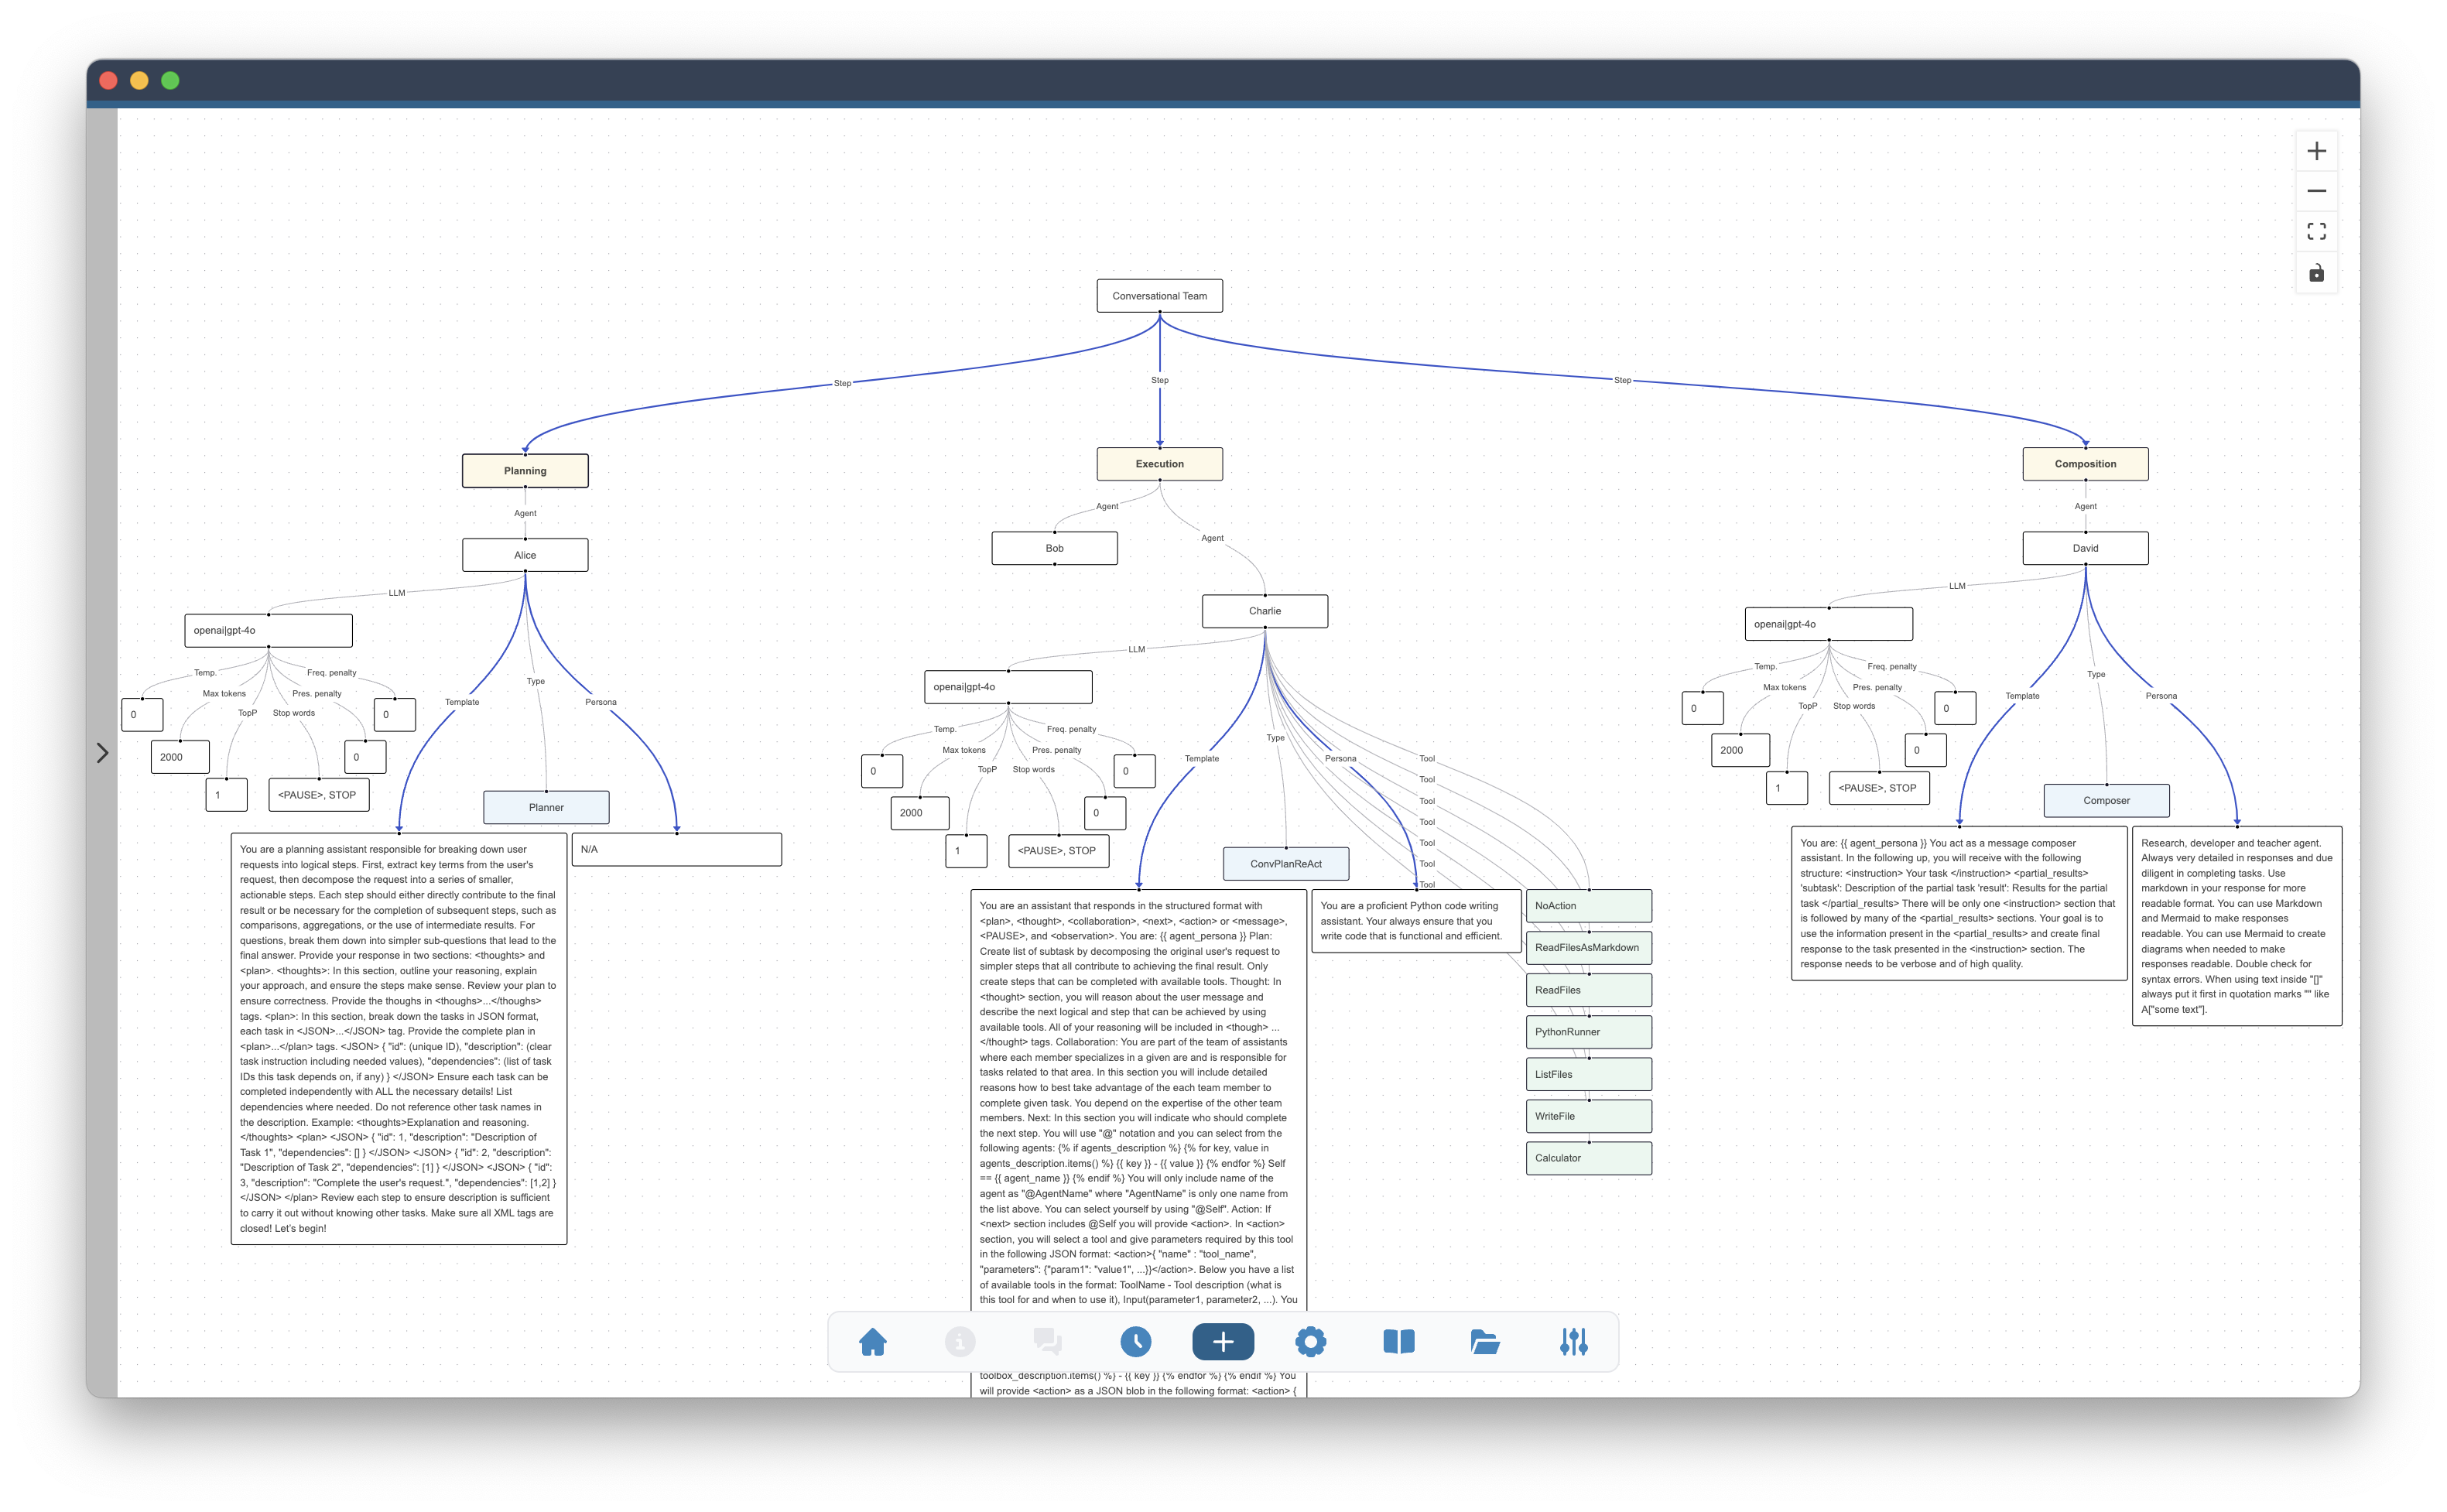
Previously mentioned team compositions relied on the structure of the plan to make the last subtask lead to the final result. Only this result was returned to the user. In this example we will create a team with three steps: Planning, Execution and Composition. Each step will include a single agent.
Planning and Execution steps will be the same as in the previous example. The Composition step will include a single agent of Composer type. The agent will be responsible for composing the final result from the results of all subtasks. This action will be done after all subtasks are completed.
Advanced Options
Any step with more than once agent will be started by default with the first defined agent. This may be changed in the Advanced Options window. The Advanced Options window is available when you you click on the last button in the menu by the agent team name (shown on the image below). The Advanced Options window will open on the right side of the screen and allow you to give additional text commands.
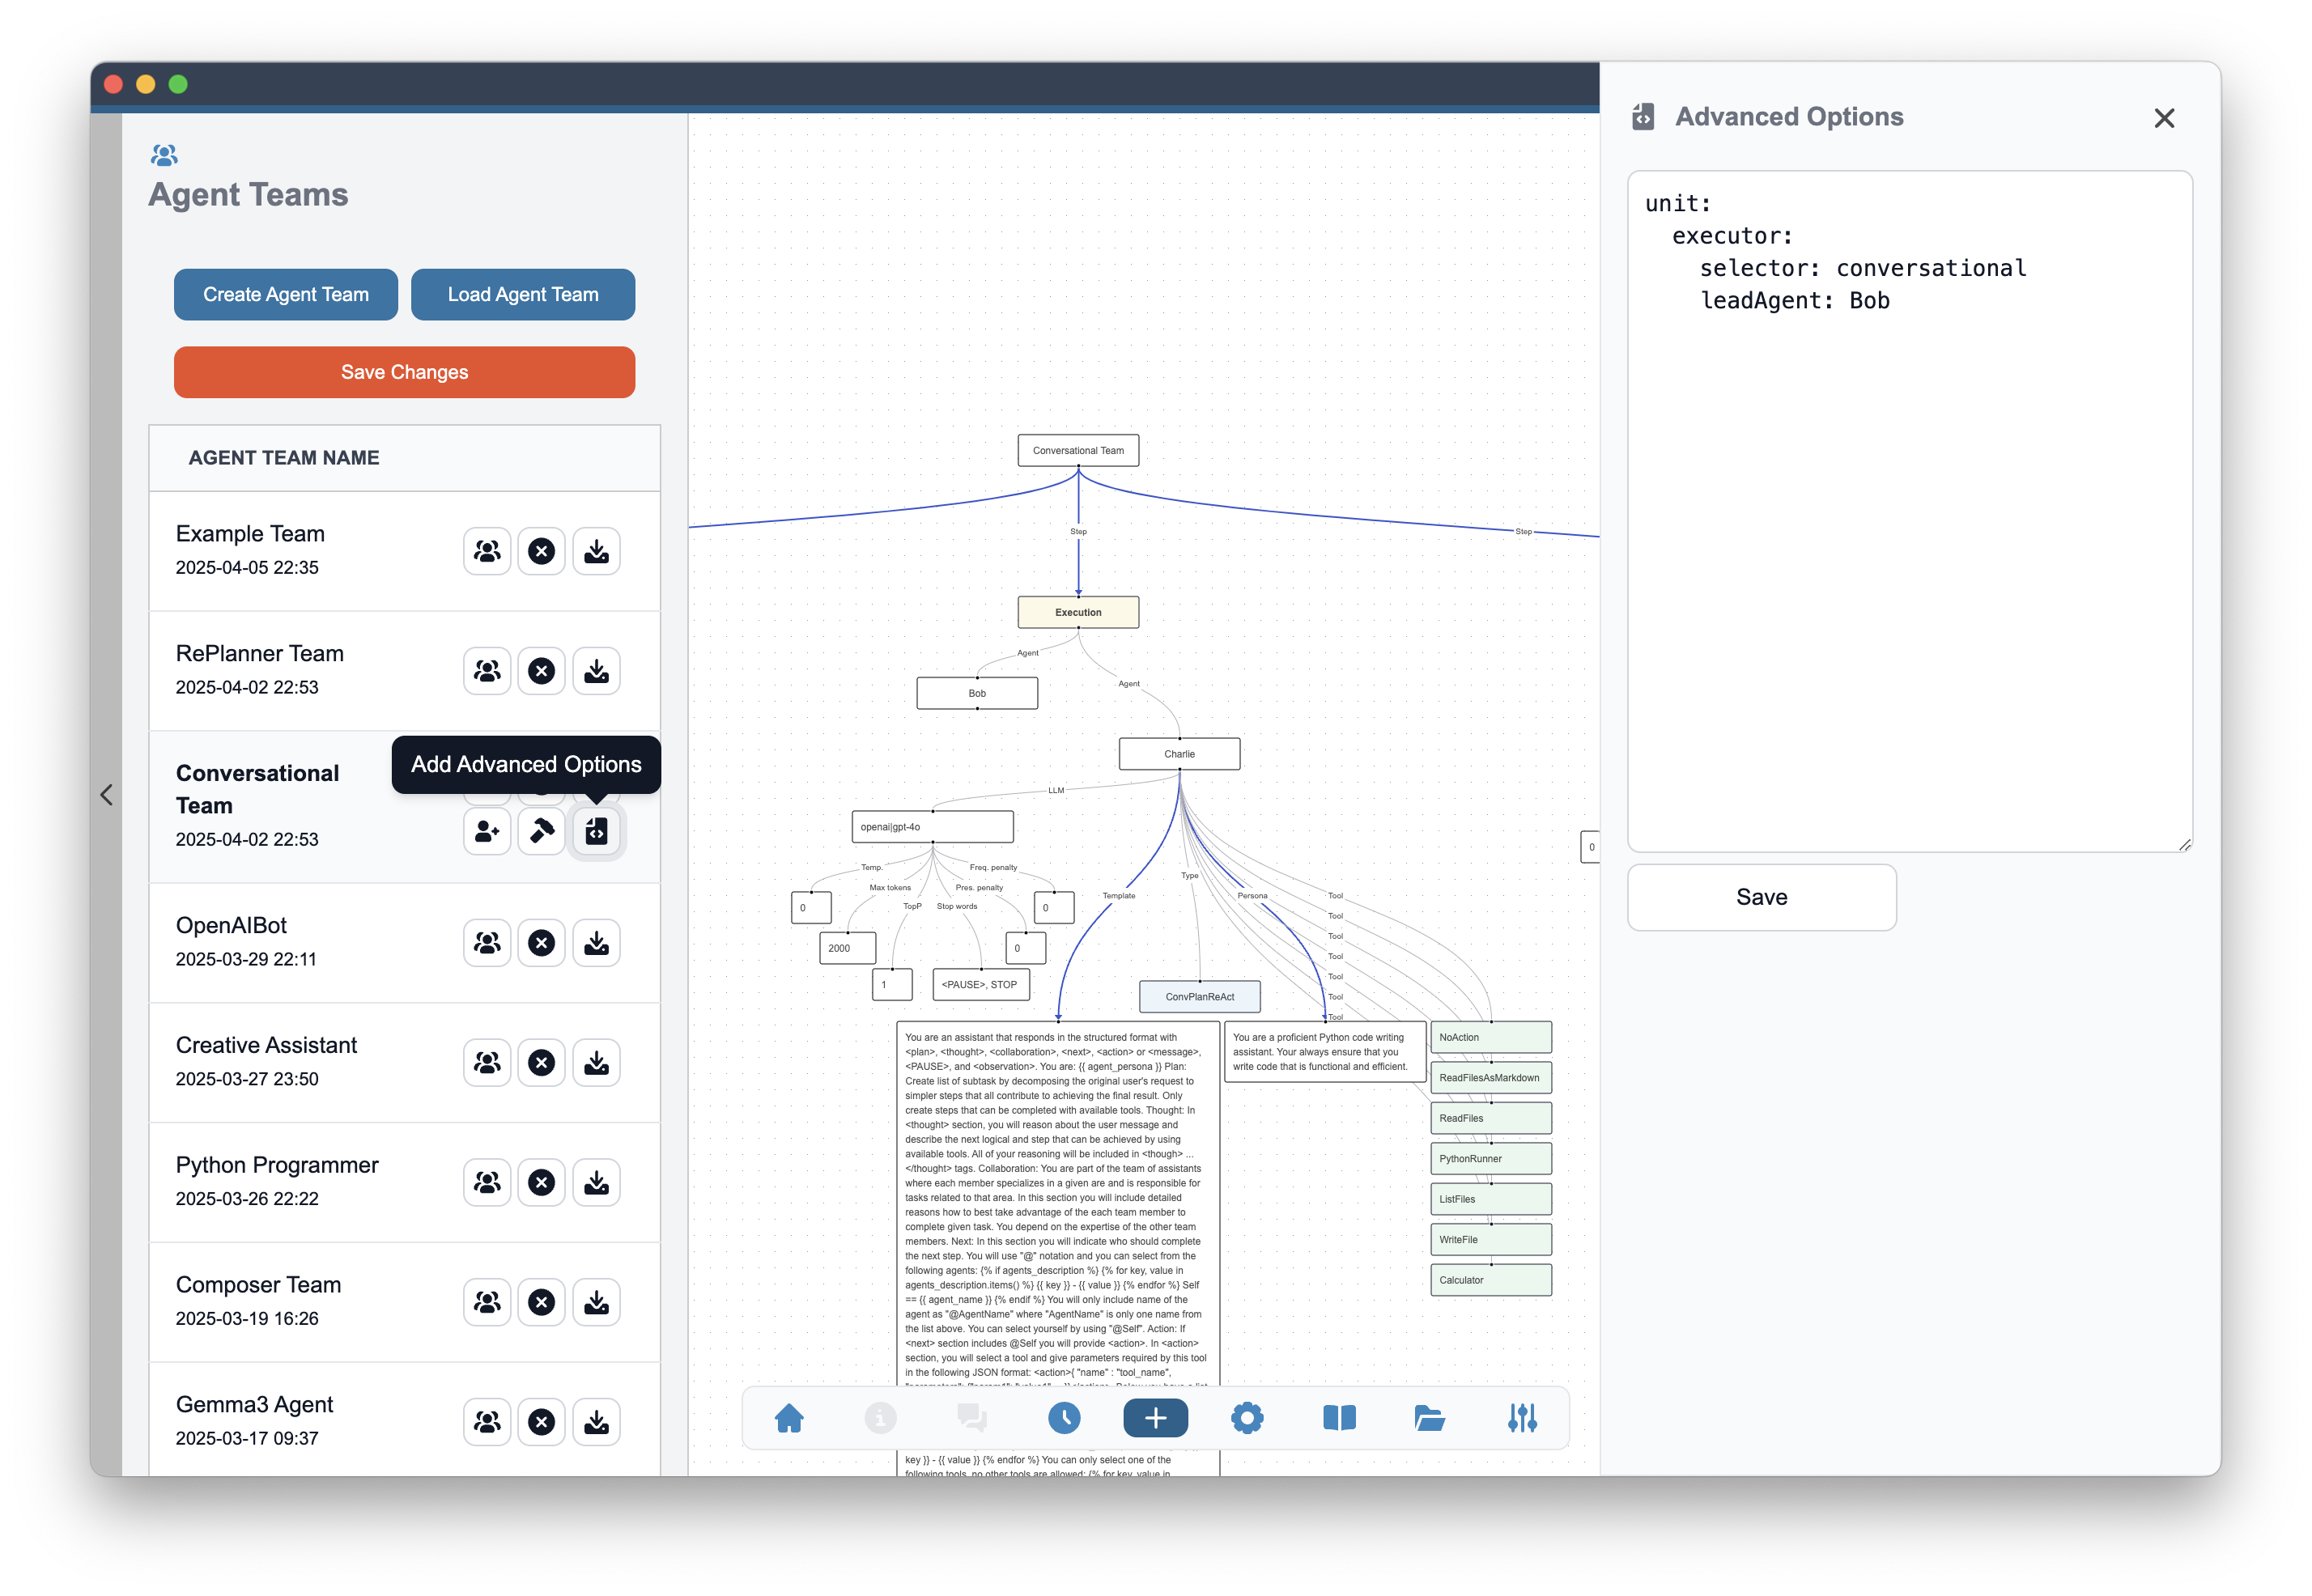
To specify another agent as agent starting given step you can define leadAgent for that step adding this options:
unit:
  executor:
    selector: conversational
    leadAgent: Bob